Welcome to your very first Arduino project! In this guide, you will learn how to make an LED blink using an Arduino. This is a simple project designed for absolute beginners—no experience required. Let’s get started!
Video Tutorial
The YouTube Channel Curio Res uploaded a great video walking through this project
Step by Step Tutorial
What You Need
Here’s what you’ll need:
- An Arduino Uno (or similar board)
- A USB cable (to connect the Arduino to your computer)
- An LED
- A 220-ohm resistor (or similar value)
- A breadboard
- Jumper wires
If you are missing any of this hardware, the amazon links to these can be found on our How To Get Started page.
Step 1: Install the Arduino Software
If you haven’t done this yet, go to the Arduino website and download the Arduino IDE (Integrated Development Environment) for your computer. Install it by following the instructions for your operating system.
Step 2: Connect Your Arduino
- Plug one end of the USB cable into your computer.
- Plug the other end into the USB port on the Arduino. (It’s the large rectangular port on the board.)
- The Arduino should light up to show it’s powered.
Step 3: Open the Arduino Software
- Open the Arduino IDE on your computer.
- At the top of the screen, you’ll see a menu bar. Click File > Examples > 01.Basics > Blink.
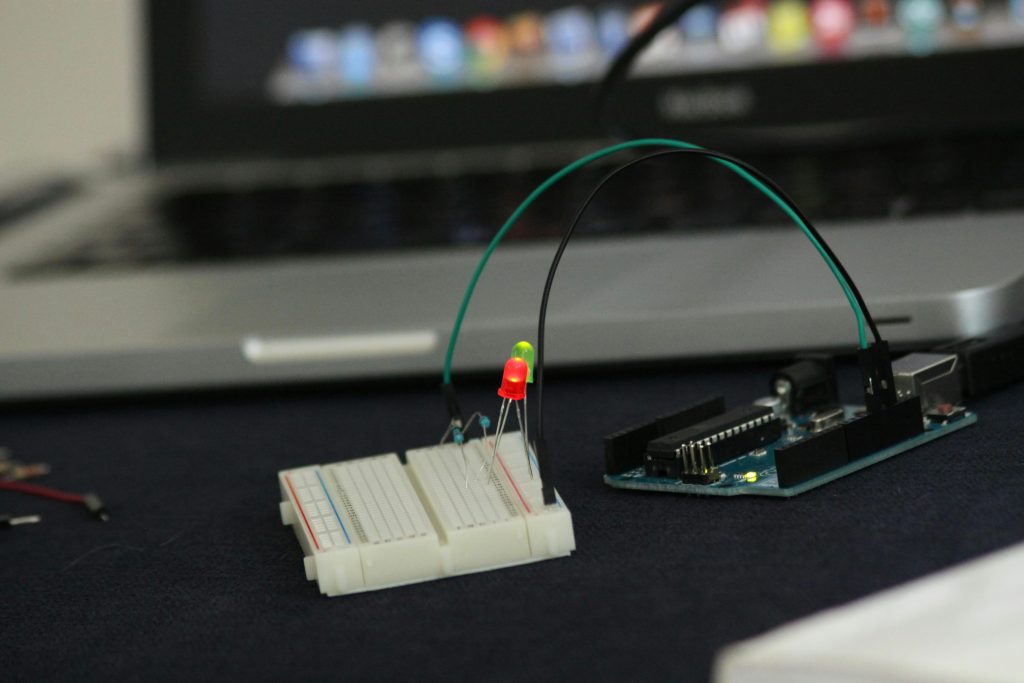
Step 4: Set Up the Circuit
- Place the LED on the breadboard.
- The longer leg (positive, called the anode) goes into one hole.
- The shorter leg (negative, called the cathode) goes into another hole.
- Connect the 220-ohm resistor to the shorter leg of the LED and a hole in the breadboard.
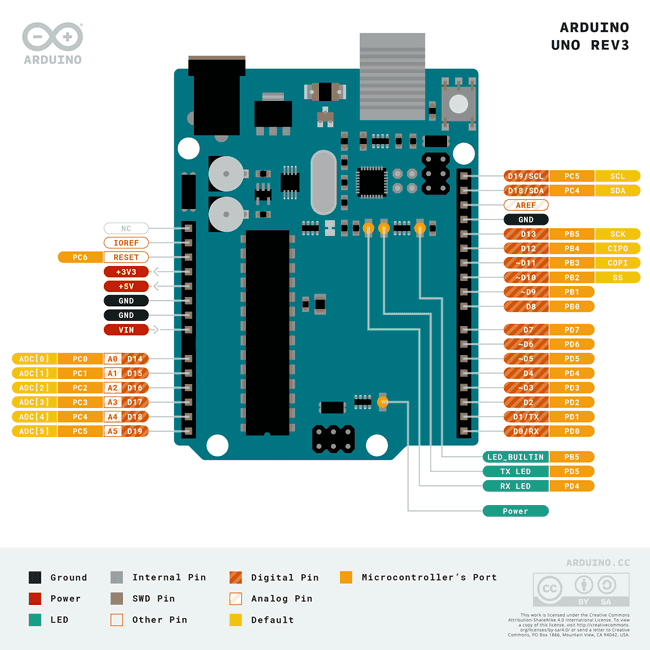
- Use a jumper wire to connect the other side of the resistor to the GND pin on the Arduino (labeled “GND”).
- Use another jumper wire to connect the longer leg of the LED to pin 13 on the Arduino (diagram below).
Step 5: Upload the Code
- In the Arduino IDE, click the Verify button (it looks like a checkmark in the top left corner). This checks for errors in the code.
- Once verified, click the Upload button (it looks like a right-facing arrow next to the checkmark). This sends the code to your Arduino.
- Wait a few seconds. The LED on pin 13 should start blinking!
- The code is attached below from Arduino, in case you need it.
/*
  Blink

  Turns an LED on for one second, then off for one second, repeatedly.

  Most Arduinos have an on-board LED you can control. On the UNO, MEGA and ZERO
  it is attached to digital pin 13, on MKR1000 on pin 6. LED_BUILTIN is set to
  the correct LED pin independent of which board is used.
  If you want to know what pin the on-board LED is connected to on your Arduino
  model, check the Technical Specs of your board at:
  https://www.arduino.cc/en/Main/Products

  modified 8 May 2014
  by Scott Fitzgerald
  modified 2 Sep 2016
  by Arturo Guadalupi
  modified 8 Sep 2016
  by Colby Newman

  This example code is in the public domain.

  https://www.arduino.cc/en/Tutorial/BuiltInExamples/Blink
*/

// the setup function runs once when you press reset or power the board
void setup() {
  // initialize digital pin LED_BUILTIN as an output.
  pinMode(LED_BUILTIN, OUTPUT);
}

// the loop function runs over and over again forever
void loop() {
  digitalWrite(LED_BUILTIN, HIGH);  // turn the LED on (HIGH is the voltage level)
  delay(1000);                      // wait for a second
  digitalWrite(LED_BUILTIN, LOW);   // turn the LED off by making the voltage LOW
  delay(1000);                      // wait for a second
}
What’s Happening?
The Arduino is running a simple program that turns the LED on for one second, then off for one second, repeating this forever. This is your first step in controlling the world with code!